{{autor}}
{{extracto palabras = "100"}} ... Lee mas
{{{paginación}}}
{{/Si}} los plataforma de blogs fantasma ha estado recibiendo mucha atención recientemente debido a su reciente cambio de versión beta a versión pública (si de alguna manera todavía no lo ha escuchado, ven aquí y leer).
Al igual que otras plataformas, Ghost admite "temas" de terceros. En este artículo, diseñaremos un blog simple, receptivo y orientado al contenido. Luego codifíquelo en un tema completamente funcional para Ghost.
El tema predeterminado para Ghost, 'Casper', es muy limpio. Primero ponen el contenido, mostrando la tipografía con una paleta de colores moderna, de modo que la atención se centra en la escritura.
Vamos a seguir ese ejemplo, por lo que nuestro proceso de diseño debe comenzar por comprender cómo funciona Ghost y qué hay disponible para el usuario en el back-end. Hay 4 elementos principales que podremos utilizar desde el back-end al diseñar el tema (aparte de los artículos / publicaciones en sí mismos, obviamente) que son:
Todo lo cual se puede establecer en la pestaña Configuración en Ghost. Estos señalan el diseño en una dirección obvia de algún tipo de pancarta en la parte superior de la página, que contiene el título, el logotipo y la descripción, y una imagen de portada como fondo.
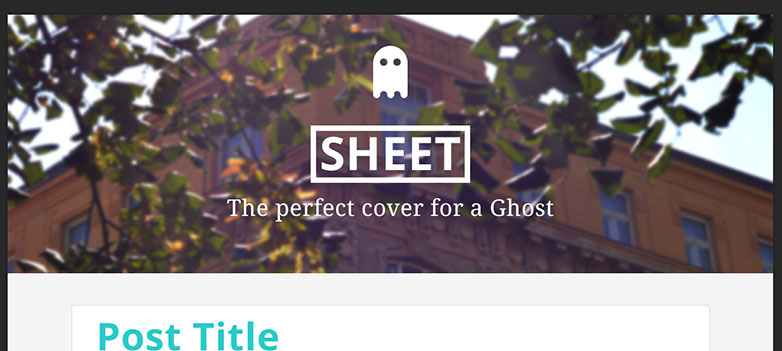
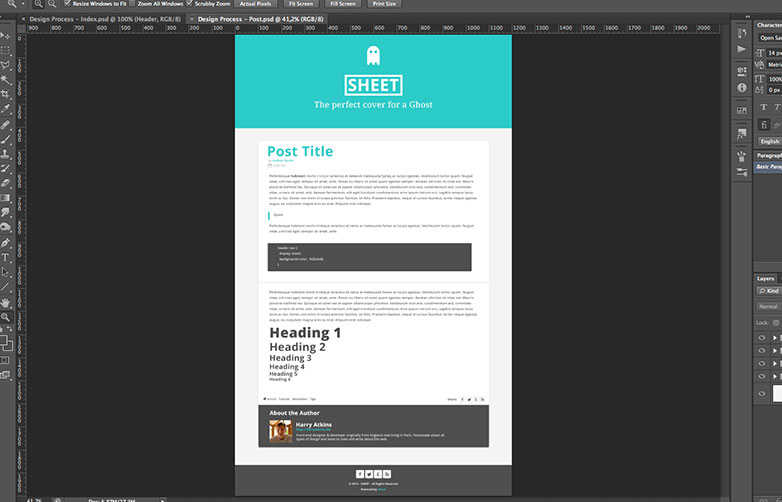
Por lo tanto, solo tenemos que diseñar 2 páginas, es decir, la página de inicio, que muestra todas las publicaciones más recientes y la página de publicación individual. Como el diseño es relativamente simple, primero mostraré la página terminada, luego revisaré los detalles nuevamente. Así que aquí está la página "inicio" que muestra las últimas publicaciones:

Como puede ver, lo más destacado de colores, junto con el diseño básico y limpio. Repasemos los detalles otra vez. Así que tenemos el encabezado, que contiene el logotipo (aquí he hecho un pequeño disfraz de hoja para un fantasma), el nombre del blog y la descripción.
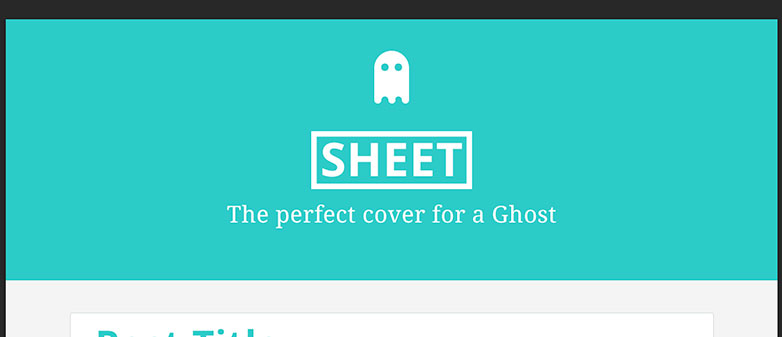
Entonces, si el usuario elige una foto de portada, la pondremos aquí como una imagen de fondo de ancho completo. Si no, buscaremos un color azul sólido que será nuestro color de resaltado como el anterior.
Luego, tenemos algunos cuadros de contenido en los que mostraremos toda la información sobre cada publicación (título, fecha de publicación, autor, etiquetas) y el fragmento.
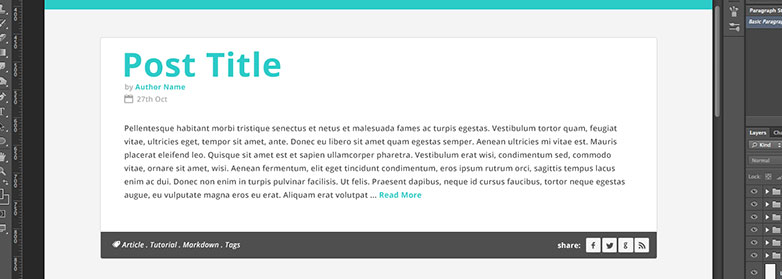
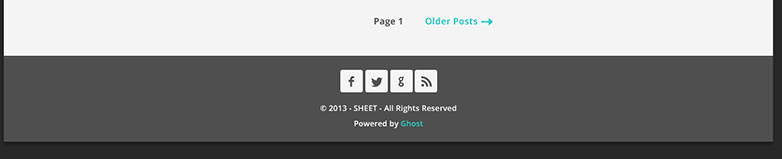
Finalmente hacemos un enlace de paginación simple y un pie de página. En el cuadro para compartir artículos, el pie de página y todo el sitio, utilizamos una fuente de icono personalizada hecha en Fontello y la fuente Open Sans de Google Web Fonts. Que veremos cómo implementarlo más tarde.
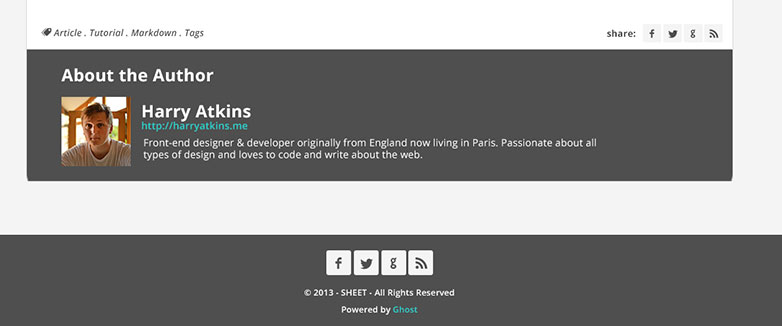
Este diseño es muy similar a la página de inicio. Excepto que el bloque en el que encerramos el extracto anterior se estirará a toda la altura y mostrará todo el contenido. Además, agregaremos un cuadro de autor en la parte inferior.
Así que todo es igual, aparte de un estilo de texto en línea que veremos en la etapa de desarrollo. Y aquí está la nueva caja de autor:
De acuerdo, entonces ahora el diseño ha sido revisado (y obviamente lo personalizamos según sus preferencias). Es hora de comenzar con el desarrollo. Antes que nada, si aún no lo has hecho, tómate un segundo y lee el Fantasma oficial documentación sobre la creación de temas. Son muy claros y concisos sobre lo que se necesita y la estructura del archivo, etc. Básicamente para este tutorial, podemos dividir el desarrollo en dos etapas. Contenido y estilo Al igual que una relación básica entre HTML y CSS, haremos que el tema funcione, luego haremos que se vea como nuestro diseño.
Para comenzar, necesitará tener Ghost instalado localmente en su máquina. Esto es relativamente sencillo de hacer, y ahora incluso hay instaladores automáticos (como éste ) Una vez que esté instalado y en ejecución, necesitará encontrar la carpeta fantasma que se llama 'ghost-version.number' (en el momento de escribir esto es 'ghost-0.3.2'). Una vez localizado, vaya a 'contenido / temas', allí querrá crear una nueva carpeta que tenga el nombre de su tema. Entonces en este caso lo llamaremos 'hoja'. Dentro de esa carpeta, vamos a hacer 2 archivos que son esenciales para un tema de Fantasma. Es decir 'index.hbs' y 'post.hbs', si ha leído la documentación de Ghost (o ha utilizado Handlebars en otro lugar), reconocerá el formato de archivo '.hbs', lo que significa que podemos usar los llamados 'manubrios' : {{}} en nuestra plantilla.
Después de eso, agregaremos otro archivo llamado 'default.hbs' y una estructura de carpetas para nuestros activos y archivos parciales. Sigue esta estructura de archivos:
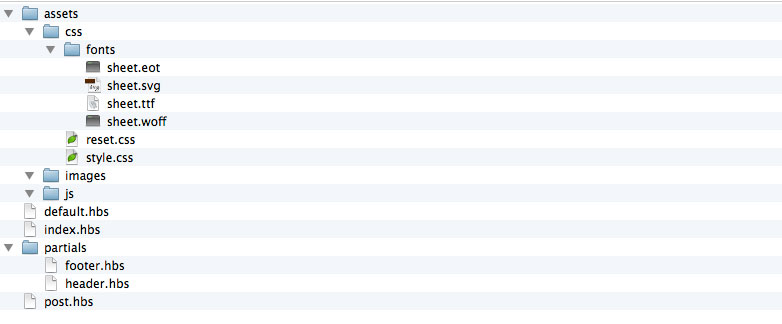
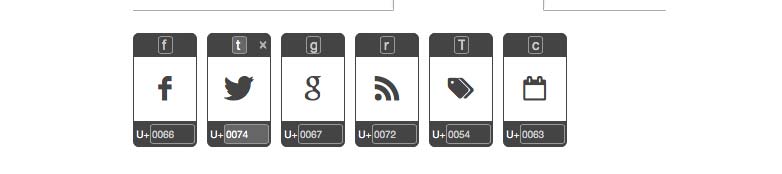
En 'assets / css / fonts' colocaremos nuestros archivos de fuentes de iconos para la implementación @ font-face. Para este diseño, solo he elegido 6 íconos: Facebook, Twitter, Google, RSS, Etiquetas, Calendario.
Aparte de eso, el resto de los archivos son bastante autoexplicativos. Ahora entremos en el código. Primero veremos los dos archivos esenciales en el tema.
En cuanto a los diseños, daré primero todo el contenido del archivo, luego dividiremos los bits importantes. Antes que nada, el archivo 'index.hbs':
{{!< default}}{{> header}}{{#foreach posts}}{{autor}}
{{extracto palabras = "100"}} ... Lee mas
{{/ foreach}} {{# si la paginación}} {{{paginación}}} {{/Si}} {{> pie de página}} So to explain what's happening, the very first line is essential to the theme and tell us that this file will be inserted into the content area into the default file. The second line then inserts our header. Instead of putting it into this file we'll create a partial file later in the 'partials' directory. HBS files are just like HTML files in which you can include normal HTML elements. So the next element in the file is a which will hold all of our main content. Then inside of the repeater we'll put our article element that will contain the post. Inside each there will be a with the title and the meta data of the article (author and publish date). After that the actual excerpt. Then a that has our post's tags (in between an 'if' statement) and the share links, with some span's calling in our icon font. Finally we have some pagination, and we eventually call in the which works like the header. So as you can see it's relatively simple code. Obviously any class or ID names are optional for CSS styling. Next up comes the 'post.hbs' file. Which is mostly similar, but with a few additions and modifications. /">← Go Back {{title}} by {{author}} {{date format='DD MMM YYYY'}} {{content}} {{#if tags}} Tags: {{tags separator=" . "}} {{/if}} Share: {{#if author}} About the Author {{#if author.image}} {{/if}} {{author.name}} {{#if author.website}} {{author.website}} {{/if}} {{author.bio}} {{/if}}{{/post}} {{> footer}} Once again we have the and handlebars. And our element. But this time the wrapping handlebar is Then we call in the (Not excerpt, because this is the individual page we want to show all of the content in the post.) Another difference here is the 'if' statement which is verifying if there's an author for the post. If there is we'll show a box with the author's image, name, URL and bio. All of these elements are editable in the back-end by the user, and will either show up or not depending on whether they exist. 'default.hbs' and the partial files Now we're going to look at the default.hbs file. So if you haven't made it yet, create a new file. In that file we're going to put all the default things that are needed for our page to display correctly in a browser, mainly the doctype and the , and tags. {{ghost_head}} {{{body}}} {{ghost_foot}}
{{!< default}} So to explain what's happening, the very first line is essential to the theme and tell us that this file will be inserted into the content area into the default file. The second line then inserts our header. Instead of putting it into this file we'll create a partial file later in the 'partials' directory. HBS files are just like HTML files in which you can include normal HTML elements. So the next element in the file is a which will hold all of our main content. Then inside of the repeater we'll put our article element that will contain the post. Inside each there will be a with the title and the meta data of the article (author and publish date). After that the actual excerpt. Then a that has our post's tags (in between an 'if' statement) and the share links, with some span's calling in our icon font. Finally we have some pagination, and we eventually call in the which works like the header. So as you can see it's relatively simple code. Obviously any class or ID names are optional for CSS styling. Next up comes the 'post.hbs' file. Which is mostly similar, but with a few additions and modifications. /">← Go Back {{title}} by {{author}} {{date format='DD MMM YYYY'}} {{content}} {{#if tags}} Tags: {{tags separator=" . "}} {{/if}} Share: {{#if author}} About the Author {{#if author.image}} {{/if}} {{author.name}} {{#if author.website}} {{author.website}} {{/if}} {{author.bio}} {{/if}}{{/post}} {{> footer}} Once again we have the and handlebars. And our element. But this time the wrapping handlebar is Then we call in the (Not excerpt, because this is the individual page we want to show all of the content in the post.) Another difference here is the 'if' statement which is verifying if there's an author for the post. If there is we'll show a box with the author's image, name, URL and bio. All of these elements are editable in the back-end by the user, and will either show up or not depending on whether they exist. 'default.hbs' and the partial files Now we're going to look at the default.hbs file. So if you haven't made it yet, create a new file. In that file we're going to put all the default things that are needed for our page to display correctly in a browser, mainly the doctype and the , and tags. {{ghost_head}} {{{body}}} {{ghost_foot}}
{{> header}} So to explain what's happening, the very first line is essential to the theme and tell us that this file will be inserted into the content area into the default file. The second line then inserts our header. Instead of putting it into this file we'll create a partial file later in the 'partials' directory. HBS files are just like HTML files in which you can include normal HTML elements. So the next element in the file is a which will hold all of our main content. Then inside of the repeater we'll put our article element that will contain the post. Inside each there will be a with the title and the meta data of the article (author and publish date). After that the actual excerpt. Then a that has our post's tags (in between an 'if' statement) and the share links, with some span's calling in our icon font. Finally we have some pagination, and we eventually call in the which works like the header. So as you can see it's relatively simple code. Obviously any class or ID names are optional for CSS styling. Next up comes the 'post.hbs' file. Which is mostly similar, but with a few additions and modifications. /">← Go Back {{title}} by {{author}} {{date format='DD MMM YYYY'}} {{content}} {{#if tags}} Tags: {{tags separator=" . "}} {{/if}} Share: {{#if author}} About the Author {{#if author.image}} {{/if}} {{author.name}} {{#if author.website}} {{author.website}} {{/if}} {{author.bio}} {{/if}}{{/post}} {{> footer}} Once again we have the and handlebars. And our element. But this time the wrapping handlebar is Then we call in the (Not excerpt, because this is the individual page we want to show all of the content in the post.) Another difference here is the 'if' statement which is verifying if there's an author for the post. If there is we'll show a box with the author's image, name, URL and bio. All of these elements are editable in the back-end by the user, and will either show up or not depending on whether they exist. 'default.hbs' and the partial files Now we're going to look at the default.hbs file. So if you haven't made it yet, create a new file. In that file we're going to put all the default things that are needed for our page to display correctly in a browser, mainly the doctype and the , and tags. {{ghost_head}} {{{body}}} {{ghost_foot}}
{{/if}} {{author.name}} {{#if author.website}} {{author.website}} {{/if}} {{author.bio}} {{/if}}{{/post}} {{> footer}} Once again we have the and handlebars. And our element. But this time the wrapping handlebar is Then we call in the (Not excerpt, because this is the individual page we want to show all of the content in the post.) Another difference here is the 'if' statement which is verifying if there's an author for the post. If there is we'll show a box with the author's image, name, URL and bio. All of these elements are editable in the back-end by the user, and will either show up or not depending on whether they exist. 'default.hbs' and the partial files Now we're going to look at the default.hbs file. So if you haven't made it yet, create a new file. In that file we're going to put all the default things that are needed for our page to display correctly in a browser, mainly the doctype and the , and tags. {{ghost_head}} {{{body}}} {{ghost_foot}}
{{#foreach posts}} So to explain what's happening, the very first line is essential to the theme and tell us that this file will be inserted into the content area into the default file. The second line then inserts our header. Instead of putting it into this file we'll create a partial file later in the 'partials' directory. HBS files are just like HTML files in which you can include normal HTML elements. So the next element in the file is a which will hold all of our main content. Then inside of the repeater we'll put our article element that will contain the post. Inside each there will be a with the title and the meta data of the article (author and publish date). After that the actual excerpt. Then a that has our post's tags (in between an 'if' statement) and the share links, with some span's calling in our icon font. Finally we have some pagination, and we eventually call in the which works like the header. So as you can see it's relatively simple code. Obviously any class or ID names are optional for CSS styling. Next up comes the 'post.hbs' file. Which is mostly similar, but with a few additions and modifications. /">← Go Back {{title}} by {{author}} {{date format='DD MMM YYYY'}} {{content}} {{#if tags}} Tags: {{tags separator=" . "}} {{/if}} Share: {{#if author}} About the Author {{#if author.image}} {{/if}} {{author.name}} {{#if author.website}} {{author.website}} {{/if}} {{author.bio}} {{/if}}{{/post}} {{> footer}} Once again we have the and handlebars. And our element. But this time the wrapping handlebar is Then we call in the (Not excerpt, because this is the individual page we want to show all of the content in the post.) Another difference here is the 'if' statement which is verifying if there's an author for the post. If there is we'll show a box with the author's image, name, URL and bio. All of these elements are editable in the back-end by the user, and will either show up or not depending on whether they exist. 'default.hbs' and the partial files Now we're going to look at the default.hbs file. So if you haven't made it yet, create a new file. In that file we're going to put all the default things that are needed for our page to display correctly in a browser, mainly the doctype and the , and tags. {{ghost_head}} {{{body}}} {{ghost_foot}}
{{/if}} {{author.name}} {{#if author.website}} {{author.website}} {{/if}} {{author.bio}} {{/if}}{{/post}} {{> footer}} Once again we have the and handlebars. And our element. But this time the wrapping handlebar is Then we call in the (Not excerpt, because this is the individual page we want to show all of the content in the post.) Another difference here is the 'if' statement which is verifying if there's an author for the post. If there is we'll show a box with the author's image, name, URL and bio. All of these elements are editable in the back-end by the user, and will either show up or not depending on whether they exist. 'default.hbs' and the partial files Now we're going to look at the default.hbs file. So if you haven't made it yet, create a new file. In that file we're going to put all the default things that are needed for our page to display correctly in a browser, mainly the doctype and the , and tags. {{ghost_head}} {{{body}}} {{ghost_foot}}
{{/if}} {{author.name}} {{#if author.website}} {{author.website}} {{/if}} {{author.bio}} {{/if}}{{/post}} {{> footer}} Once again we have the and handlebars. And our element. But this time the wrapping handlebar is Then we call in the (Not excerpt, because this is the individual page we want to show all of the content in the post.) Another difference here is the 'if' statement which is verifying if there's an author for the post. If there is we'll show a box with the author's image, name, URL and bio. All of these elements are editable in the back-end by the user, and will either show up or not depending on whether they exist. 'default.hbs' and the partial files Now we're going to look at the default.hbs file. So if you haven't made it yet, create a new file. In that file we're going to put all the default things that are needed for our page to display correctly in a browser, mainly the doctype and the , and tags. {{ghost_head}} {{{body}}} {{ghost_foot}}
{{> footer}} So to explain what's happening, the very first line is essential to the theme and tell us that this file will be inserted into the content area into the default file. The second line then inserts our header. Instead of putting it into this file we'll create a partial file later in the 'partials' directory. HBS files are just like HTML files in which you can include normal HTML elements. So the next element in the file is a which will hold all of our main content. Then inside of the repeater we'll put our article element that will contain the post. Inside each there will be a with the title and the meta data of the article (author and publish date). After that the actual excerpt. Then a that has our post's tags (in between an 'if' statement) and the share links, with some span's calling in our icon font. Finally we have some pagination, and we eventually call in the which works like the header. So as you can see it's relatively simple code. Obviously any class or ID names are optional for CSS styling. Next up comes the 'post.hbs' file. Which is mostly similar, but with a few additions and modifications. /">← Go Back {{title}} by {{author}} {{date format='DD MMM YYYY'}} {{content}} {{#if tags}} Tags: {{tags separator=" . "}} {{/if}} Share: {{#if author}} About the Author {{#if author.image}} {{/if}} {{author.name}} {{#if author.website}} {{author.website}} {{/if}} {{author.bio}} {{/if}}{{/post}} {{> footer}} Once again we have the and handlebars. And our element. But this time the wrapping handlebar is Then we call in the (Not excerpt, because this is the individual page we want to show all of the content in the post.) Another difference here is the 'if' statement which is verifying if there's an author for the post. If there is we'll show a box with the author's image, name, URL and bio. All of these elements are editable in the back-end by the user, and will either show up or not depending on whether they exist. 'default.hbs' and the partial files Now we're going to look at the default.hbs file. So if you haven't made it yet, create a new file. In that file we're going to put all the default things that are needed for our page to display correctly in a browser, mainly the doctype and the , and tags. {{ghost_head}} {{{body}}} {{ghost_foot}}
So to explain what's happening, the very first line is essential to the theme and tell us that this file will be inserted into the content area into the default file. The second line then inserts our header. Instead of putting it into this file we'll create a partial file later in the 'partials' directory. HBS files are just like HTML files in which you can include normal HTML elements. So the next element in the file is a which will hold all of our main content. Then inside of the repeater we'll put our article element that will contain the post. Inside each there will be a with the title and the meta data of the article (author and publish date). After that the actual excerpt. Then a that has our post's tags (in between an 'if' statement) and the share links, with some span's calling in our icon font. Finally we have some pagination, and we eventually call in the which works like the header. So as you can see it's relatively simple code. Obviously any class or ID names are optional for CSS styling. Next up comes the 'post.hbs' file. Which is mostly similar, but with a few additions and modifications. /">← Go Back {{title}} by {{author}} {{date format='DD MMM YYYY'}} {{content}} {{#if tags}} Tags: {{tags separator=" . "}} {{/if}} Share: {{#if author}} About the Author {{#if author.image}} {{/if}} {{author.name}} {{#if author.website}} {{author.website}} {{/if}} {{author.bio}} {{/if}}{{/post}} {{> footer}} Once again we have the and handlebars. And our element. But this time the wrapping handlebar is Then we call in the (Not excerpt, because this is the individual page we want to show all of the content in the post.) Another difference here is the 'if' statement which is verifying if there's an author for the post. If there is we'll show a box with the author's image, name, URL and bio. All of these elements are editable in the back-end by the user, and will either show up or not depending on whether they exist. 'default.hbs' and the partial files Now we're going to look at the default.hbs file. So if you haven't made it yet, create a new file. In that file we're going to put all the default things that are needed for our page to display correctly in a browser, mainly the doctype and the , and tags. {{ghost_head}} {{{body}}} {{ghost_foot}}
{{!< default}}{{> header}}{{#post}}{{{url}}}">{{title}} by {{author}} {{date format='DD MMM YYYY'}} {{content}} {{#if tags}} Tags: {{tags separator=" . "}} {{/if}} Share: {{#if author}} About the Author {{#if author.image}} {{/if}} {{author.name}} {{#if author.website}} {{author.website}} {{/if}} {{author.bio}} {{/if}}{{/post}} {{> footer}} Once again we have the and handlebars. And our element. But this time the wrapping handlebar is Then we call in the (Not excerpt, because this is the individual page we want to show all of the content in the post.) Another difference here is the 'if' statement which is verifying if there's an author for the post. If there is we'll show a box with the author's image, name, URL and bio. All of these elements are editable in the back-end by the user, and will either show up or not depending on whether they exist. 'default.hbs' and the partial files Now we're going to look at the default.hbs file. So if you haven't made it yet, create a new file. In that file we're going to put all the default things that are needed for our page to display correctly in a browser, mainly the doctype and the , and tags. {{ghost_head}} {{{body}}} {{ghost_foot}}
So to explain what's happening, the very first line is essential to the theme and tell us that this file will be inserted into the content area into the default file. The second line then inserts our header. Instead of putting it into this file we'll create a partial file later in the 'partials' directory. HBS files are just like HTML files in which you can include normal HTML elements. So the next element in the file is a which will hold all of our main content. Then inside of the repeater we'll put our article element that will contain the post. Inside each there will be a with the title and the meta data of the article (author and publish date). After that the actual excerpt. Then a that has our post's tags (in between an 'if' statement) and the share links, with some span's calling in our icon font. Finally we have some pagination, and we eventually call in the which works like the header. So as you can see it's relatively simple code. Obviously any class or ID names are optional for CSS styling. Next up comes the 'post.hbs' file. Which is mostly similar, but with a few additions and modifications. /">← Go Back {{title}} by {{author}} {{date format='DD MMM YYYY'}} {{content}} {{#if tags}} Tags: {{tags separator=" . "}} {{/if}} Share: {{#if author}} About the Author {{#if author.image}}
So to explain what's happening, the very first line is essential to the theme and tell us that this file will be inserted into the content area into the default file. The second line then inserts our header. Instead of putting it into this file we'll create a partial file later in the 'partials' directory. HBS files are just like HTML files in which you can include normal HTML elements. So the next element in the file is a which will hold all of our main content. Then inside of the repeater we'll put our article element that will contain the post. Inside each there will be a with the title and the meta data of the article (author and publish date). After that the actual excerpt. Then a that has our post's tags (in between an 'if' statement) and the share links, with some span's calling in our icon font. Finally we have some pagination, and we eventually call in the which works like the header. So as you can see it's relatively simple code. Obviously any class or ID names are optional for CSS styling. Next up comes the 'post.hbs' file. Which is mostly similar, but with a few additions and modifications. /">← Go Back {{title}} by {{author}} {{date format='DD MMM YYYY'}} {{content}} {{#if tags}} Tags: {{tags separator=" . "}} {{/if}} Share: {{#if author}} About the Author {{#if author.image}}
So to explain what's happening, the very first line is essential to the theme and tell us that this file will be inserted into the content area into the default file. The second line then inserts our header. Instead of putting it into this file we'll create a partial file later in the 'partials' directory. HBS files are just like HTML files in which you can include normal HTML elements. So the next element in the file is a which will hold all of our main content. Then inside of the repeater we'll put our article element that will contain the post. Inside each there will be a with the title and the meta data of the article (author and publish date). After that the actual excerpt. Then a that has our post's tags (in between an 'if' statement) and the share links, with some span's calling in our icon font. Finally we have some pagination, and we eventually call in the which works like the header. So as you can see it's relatively simple code. Obviously any class or ID names are optional for CSS styling. Next up comes the 'post.hbs' file. Which is mostly similar, but with a few additions and modifications. /">← Go Back {{title}} by {{author}} {{date format='DD MMM YYYY'}} {{content}} {{#if tags}} Tags: {{tags separator=" . "}} {{/if}} Share: {{#if author}} About the Author {{#if author.image}}So to explain what's happening, the very first line is essential to the theme and tell us that this file will be inserted into the content area into the default file. The second line then inserts our header. Instead of putting it into this file we'll create a partial file later in the 'partials' directory. HBS files are just like HTML files in which you can include normal HTML elements. So the next element in the file is a which will hold all of our main content. Then inside of the repeater we'll put our article element that will contain the post. Inside each there will be a with the title and the meta data of the article (author and publish date). After that the actual excerpt. Then a that has our post's tags (in between an 'if' statement) and the share links, with some span's calling in our icon font. Finally we have some pagination, and we eventually call in the which works like the header. So as you can see it's relatively simple code. Obviously any class or ID names are optional for CSS styling. Next up comes the 'post.hbs' file. Which is mostly similar, but with a few additions and modifications. /">← Go Back {{title}} by {{author}} {{date format='DD MMM YYYY'}} {{content}} {{#if tags}} Tags: {{tags separator=" . "}} {{/if}} Share: {{#if author}} About the Author {{#if author.image}}So to explain what's happening, the very first line is essential to the theme and tell us that this file will be inserted into the content area into the default file. The second line then inserts our header. Instead of putting it into this file we'll create a partial file later in the 'partials' directory. HBS files are just like HTML files in which you can include normal HTML elements. So the next element in the file is a which will hold all of our main content. Then inside of the repeater we'll put our article element that will contain the post. Inside each there will be a with the title and the meta data of the article (author and publish date). After that the actual excerpt. Then a that has our post's tags (in between an 'if' statement) and the share links, with some span's calling in our icon font. Finally we have some pagination, and we eventually call in the which works like the header. So as you can see it's relatively simple code. Obviously any class or ID names are optional for CSS styling. Next up comes the 'post.hbs' file. Which is mostly similar, but with a few additions and modifications. /">← Go Back {{title}} by {{author}} {{date format='DD MMM YYYY'}} {{content}} {{#if tags}} Tags: {{tags separator=" . "}} {{/if}} Share: {{#if author}} About the Author {{#if author.image}}So to explain what's happening, the very first line is essential to the theme and tell us that this file will be inserted into the content area into the default file. The second line then inserts our header. Instead of putting it into this file we'll create a partial file later in the 'partials' directory. HBS files are just like HTML files in which you can include normal HTML elements. So the next element in the file is a which will hold all of our main content. Then inside of the repeater we'll put our article element that will contain the post. Inside each there will be a with the title and the meta data of the article (author and publish date). After that the actual excerpt. Then a that has our post's tags (in between an 'if' statement) and the share links, with some span's calling in our icon font. Finally we have some pagination, and we eventually call in the which works like the header. So as you can see it's relatively simple code. Obviously any class or ID names are optional for CSS styling. Next up comes the 'post.hbs' file. Which is mostly similar, but with a few additions and modifications. /">← Go Back {{title}} by {{author}} {{date format='DD MMM YYYY'}} {{content}} {{#if tags}} Tags: {{tags separator=" . "}} {{/if}} Share: {{#if author}} About the Author {{#if author.image}}So to explain what's happening, the very first line is essential to the theme and tell us that this file will be inserted into the content area into the default file. The second line then inserts our header. Instead of putting it into this file we'll create a partial file later in the 'partials' directory. HBS files are just like HTML files in which you can include normal HTML elements. So the next element in the file is a which will hold all of our main content. Then inside of the repeater we'll put our article element that will contain the post. Inside each there will be a with the title and the meta data of the article (author and publish date). After that the actual excerpt. Then a that has our post's tags (in between an 'if' statement) and the share links, with some span's calling in our icon font. Finally we have some pagination, and we eventually call in the which works like the header. So as you can see it's relatively simple code. Obviously any class or ID names are optional for CSS styling. Next up comes the 'post.hbs' file. Which is mostly similar, but with a few additions and modifications. /">← Go Back {{title}} by {{author}} {{date format='DD MMM YYYY'}} {{content}} {{#if tags}} Tags: {{tags separator=" . "}} {{/if}} Share: {{#if author}} About the Author {{#if author.image}}